TRANSFER YOUR CONTENT
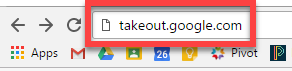
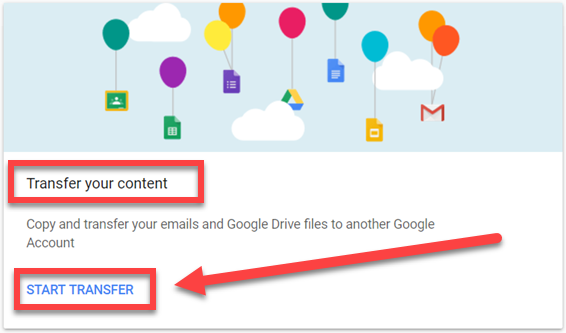
Step 1: First, let’s take a look at how to transfer your emails and Google Drive files to another Google Account. Go to Takeout.Google.com and then click Control your content. Then choose the START TRANSFER option

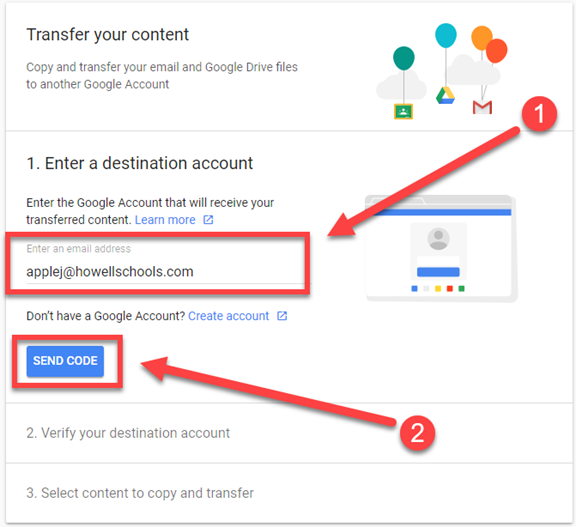
Step 2: Enter a destination account (the Google account that you would like your emails or Google Drive files transferred to). Then, click Send Code
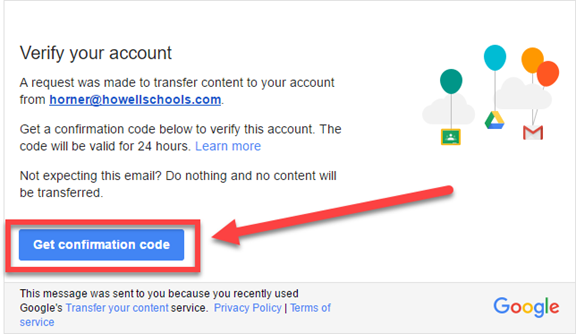
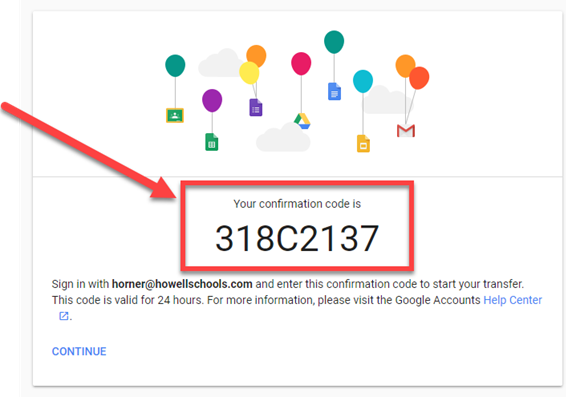
Step 3: Look in the gmail inbox of the account you would like to transfer to find a Verify your account email that contains the confirmation code. Click Get confirmation code in that email
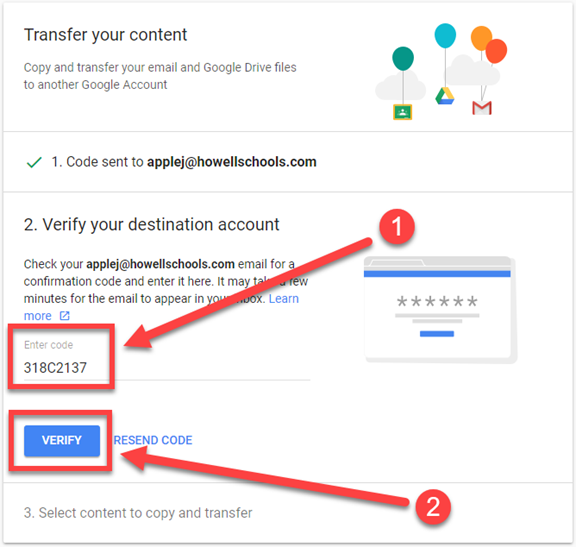
Step 4: Return to the Transfer your content page and enter the confirmation code. Then click Verify
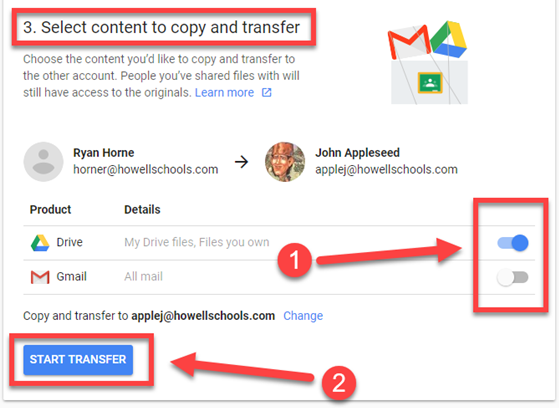
Step 5: Select which Google products you would like to transfer (Google Drive and/or Gmail). Then, click Start Transfer
Step 6: Be patient, your transfer could take up to one week depending on the amount of data stored in your Google Drive and Gmail
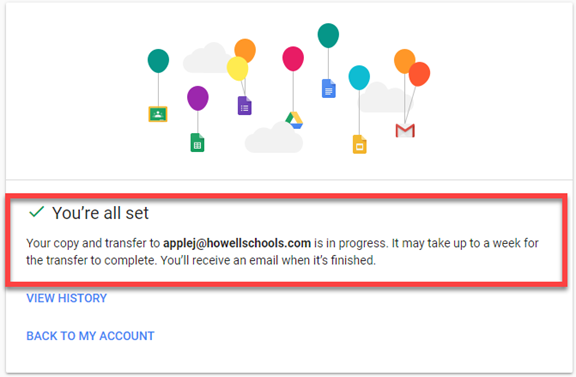
Step 7: When complete, you will notice a new folder in your Google Drive that is named with the Google Account that you transferred from. This folder contains copies of all Google Drive files that were transferred over

CREATE ARCHIVE
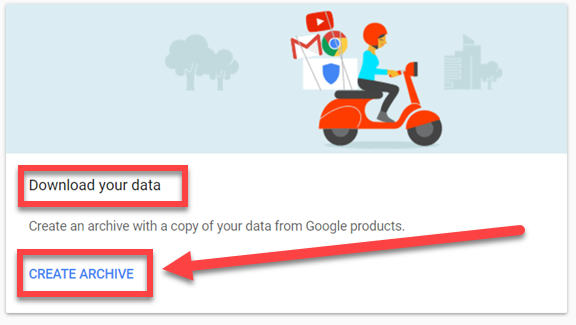
Step 1: Now let’s take a look at Create Archive. Go to Takeout.Google.com. Then, click Control your content. On the next screen select the Create Archive option

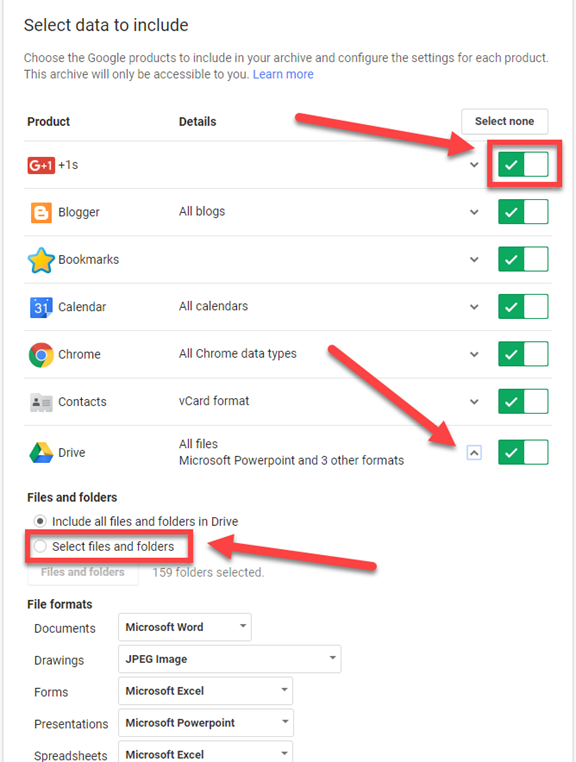
Step 1: First thing you need to do is to select the data that you would like to include in your archive. Toggle products you would like to archive on and off with the green check boxes. I clicked the dropdown arrow in Google Drive to select specific files and folders that I would like to archive
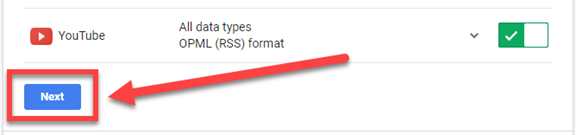
Step 2: Scroll down and click Next
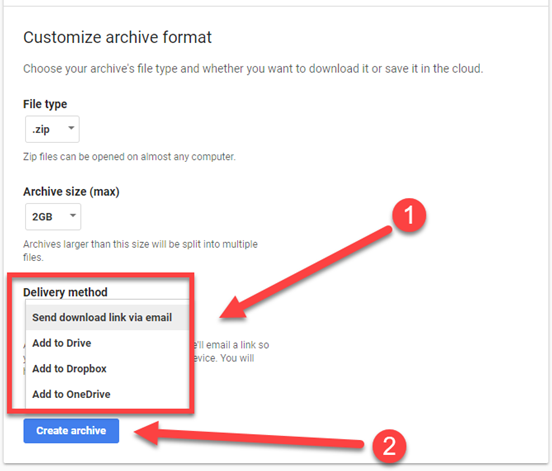
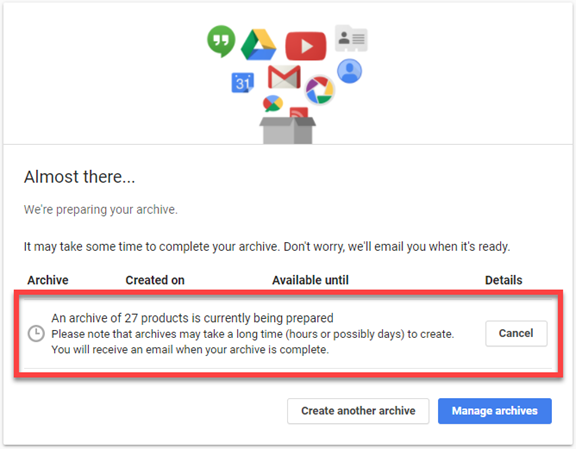
Step 3: Select your Delivery method from the dropdown arrow (I chose “Send download link via email) and then click Create archive. Be patient, it could take a few days before this process is done depending on how much data you selected to archive
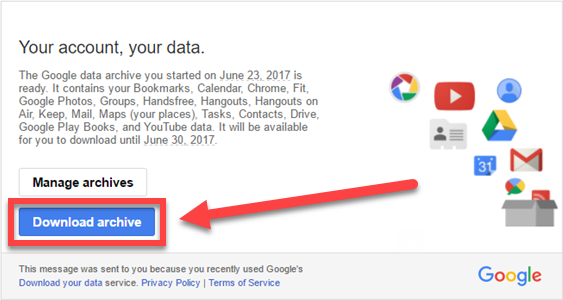
Step 4: Open the “Your Google data archive is ready” email. Click the Download archive button
Step 5: Download your archive when prompted
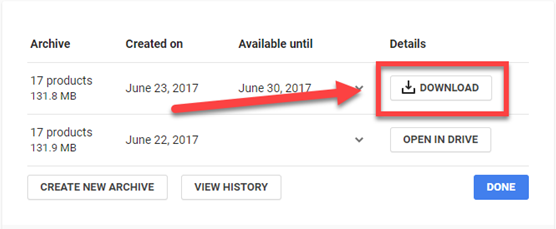
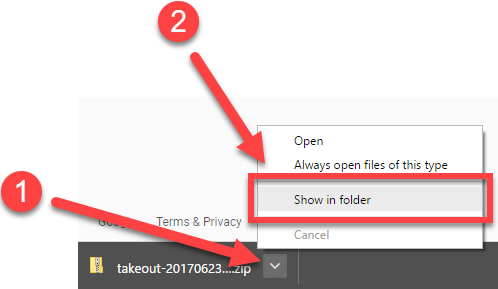
Step 6: On the bottom of your browser, click the dropdown arrow by your download. Select Show in folder. From here you an extract or unzip your files. All Google files were downloaded in Microsoft Office format